Smooth Moves

Two True Facts:

1) We are doing a lot of travel by airplane this year, and also some by train. Three quarters of it is international and so I am super excited. (That was an extra fact. 3 for the price of 2.)

2) Lilli loves to dance. I would show you a funny video of it but every time I try to video her the little radar inside her head telling her when I’m thinking about turning my camera on starts alerting her to the fact that I’m thinking about turning my camera on for the sole purpose of actually photographing her and she freezes up. Either that or she comes over and starts adjusting knobs and stuff on the camera and it turns into a video taken by Lilli instead of of Lilli.

Lilli’s new favorite dance move is inspired by the fact that we are doing a lot of travel this year. The mascot for the website Hipmunk does a little arm waggle dance when you are waiting for the site to turn up search results. For a while Lilli would imitate the chipmunk and it meant that she wanted to see him on the computer. Now it’s just a part of her dance repertoire.

My favorite new dance move involves an immersion blender and a jar of almond butter.

That’s because it’s not a dance move, it’s a smoothie.

I have historically had a hard time with smoothies. I want to love them. I’ve tried lots of combinations of fruits and veggies and protein powders and other weird add-ins. I’ve tried them with milk, I’ve tried them with water and juice, and both with and without ice. I serve them to my family at breakfast and sometimes I get a “Wow, that’s tasty” and other times half of the smoothie gets fed to the chickens. I just can never seem to get it quite right.

Recently I tried some new smoothie recipes that had peanut butter in them. They sounded like they would be good, but instead they just smelled like the inside of an empty peanut butter jar that’s been soaking in the sink for too long.

Then I came across a smoothie that included almond butter and *chocolate* in the form of protein powder. This is something we keep on hand because both Joe and I find that a good protein shot is really key in overcoming the fatigue after an exceptionally exerting exercise day. (And, yes, that was exactly the right way to phrase that…)

It also had banana in it, and ice and water. I had already had a banana with breakfast, so I wasn’t particularly in the mood for that again but I was hungry and a smoothie sounded like just the ticket. Since I didn’t want banana and I have slowly come to realize that I don’t really care for the texture of a smoothie made with ice (plus I didn’t want to use an actual blender) I decided to look in the freezer and see what kind of fruit I had in there.

That’s when I saw the cherries, and knew my snack destiny.

The frozen cherries were leftover from the tart that went with me to cookbook club. The one where we each consumed approximately a stick of butter, because all the food was from Julia Child’s Mastering the Art of French Cooking. Just thinking about that makes me sort of cringe, in a good way.

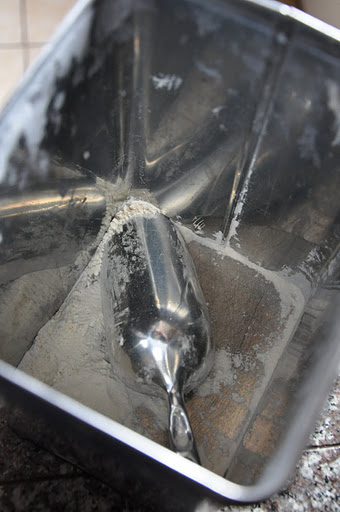
Anyway, there was only about a cup of cherries in the bag so I dumped them into a big old jar. Then I put in a scoop and a half (3/4 serving) of the chocolate protein powder and a few other things. When it was all blended and I was just on the verge of drinking it, I realized it was sort of like drinking a smoothie made of Ben and Jerry’s Cherry Garcia and then I did a happy smoothie dance. Then I got back to work.

Chocolate Cherry Smoothie
makes 1 big smoothie or 2 small ones

1 cup frozen black cherries–you could also use canned or fresh (pitted!) and add a handful of ice.
1 Tbsp or so almond butter–either creamy or crunchy will work
3/4 serving (or more if you’re really really hungry) chocolate protein powder
1 cup water or milk of choice

Put all the ingredients into the cup that came with your immersion blender or a wide mouth quart jar. You can also use a regular blender for this. Blend it all together until there aren’t any big chunks left. This part is especially important if you use crunchy almond butter like I did.

Drink up!

Accidental Hiatus of Love

I realized sometime in the last couple of days that I had put myself on an accidental hiatus. We went for a weekend away and that pretty much sealed the deal.

It was actually pretty awesome, and definitely much needed.

I spent a lot of time in a hot tub and sitting in front of a fire, mostly accompanied by a large glass of wine.

And a lot of time with Joe and Lilli, just the three of us in a big quiet house. We got there early and were the last to leave. I didn’t want it to end.

This week has been busy for us, as usual, but with more special reasons than your average busy week. It was a certain lovey romantical type of holiday, for one. And two, Joe’s sister is here visiting from Israel with her fiancé (They hit the courthouse yesterday, so engagement is a thing of the past for them. Mazel Tov!).

When Monday rolled around I realized I needed to grocery shop in a bad sort of way, and that I had yet to unpack anything red or pink or tissue papery in nature for Valentine’s card making. I really really wanted to make these once I saw them, and seriously considered it for about 2 minutes before I realized I would have had to have started in like December to actually be able to finish them in time. Ha.

I did however find time to make the one thing that Joe requested and I knew I couldn’t turn down, especially since he also requested them as a Hanukkah gift and I never got around to making them.


Peanut butter cups. For two.

Even though I actually let him eat them all because I, well, bought myself a box of chocolates Monday and they were pretty much half gone by Tuesday night.

The peanut butter cups really do make a nice treat for two people though, if you make them according to this recipe. I bought heart shaped silicone baking cups the first time I made these, which was for our second Valentine’s Day together. You can  use regular old paper baking cups too, and that can make it a good way to dress them up for just about any treat giving occasion.

Peanut Butter Cups for Two
makes 4 cups

1/3 cup creamy peanut butter
1/2 cup heavy whipped cream, measured when whipped
sugar to taste
1 lb good quality chocolate, tempered

You will need to temper the chocolate for this recipe. If you aren’t familiar with this process, there are lots of great how-to’s floating around the internet. Try here and here.

Using a clean pastry brush paint the insides of 4 regular sized cupcake cups with a layer of tempered chocolate. You want the coating to be thick enough that you cannot see light through, but not so thick that it will be hard to bite into. Pay special attention to the crease of the cup, as sometimes an air pocket will form there, where filling can later seep out. Put the mold on a flat surface in the freezer to allow the chocolate to set up.

While the chocolate sets, mix your filling. Fold together the whipped cream and peanut butter and then sweeten until you like the taste. I prefer mine a little bit less sweet than commercial brands so that it tastes more like peanut butter and less like sugar. You can use either powdered or granulated sugar here. Granulated will break down the whipped cream a little more and the filling will be softer, while powdered will make it a little thicker, more like a paste. The difference is pretty slight though, unless you add a lot of sugar.

Take your molds out of the freezer and fill each cup, leaving about 1/8″ headspace at the top. Make sure the top of the filling is nice and smooth, with no peaks sticking up over the top of the cup edge. This will ensure that you get a complete seal when you put the top layer of chocolate on.

Spoon a little bit of chocolate into the top of each cup, and, using a small chef’s palette knife (offset spatula to some) smooth it out and seal it all the way up to the edge of the cup. Add a bit more if you need it. It’s ok if you have a little extra, just scrape it off using the edge to help you.

Pop back in the freezer for about 15 minutes, then you should be able to remove them from their molds. If you are using decorative paper cups, you can skip this step and just put them into the fridge until you are ready for them.

Now go share them with your honey! (You might need a glass of milk…)

Stored in the fridge, they will last about 5 days.

Little Things

On Wednesday I woke up to a gorgeous sunrise.

OK, well to fair I woke up about an hour before the sun even did and then after lying in bed with a cuddly kid and a cuddly cat and a cuddly husband for a while I got out of bed to see that there was a gorgeous sunrise afoot.

So while Joe showered I got Lilli and I up and dressed lickety-split and out we headed into the freezing morning to greet the day as a day should be greeted…with a lot of mirth and a tiny bit of cursing about how damn cold it is.

Since we were already out there, we let the chickens out in the beautiful pre-dawn light, which was probably the highlight of Lilli’s day because she loves to be outside and she loves those chickens. Then we came in and made some breakfast and went about out business, which included a trip down to Cash and Carry to buy a humongous bag of sesame seeds for $5 because I had a plan.

A few weeks ago we were shopping in Pike Place Market and we stopped in to browse at Cost Plus (World Market) where they always have things I didn’t know I needed. This time was no exception, as waiting for me at the checkout counter–the land of impulse buys–was a barrel with little packages of Loucks Sesame Snaps,  one of my all time favorite impulse buys. (Which I have since found out that almost nobody I know has ever even heard of them. What?)

These were different though. These ones had chocolate striped delicately across the top. Yum. Why did I not know about this before?!

I restrained myself and only bought one package because sesame candy is something I’ve been meaning to try my hand at making for a while. I knew they would be easy enough to replicate at home should the combination be what I expected it to be. In other words, perfect. Which they totally were.

I made them with a dark chocolate like the ones I bought, and they are probably not going to last very long here in our house. Joe even said that they were quote “Good for a sesame candy, if you don’t like sesame.” Which he doesn’t. (Then we went on a date!)

Those little things made my Wednesday, just like getting to see the sun in it’s full cycle with Lilli did. They made it even sunnier and brighter and more productive and fun that it would have been on it’s own. And more tasty. Which was so good because Tuesday was a one way ticket to Lame-Town. Anyway these little candies will get you on the tracks to Awesome-Town if you decide to make them, especially if you follow up your snappy snack with another trip to the park, this time to view the sunset.

Toasted Sesame Snaps with Chocolate Drizzle

2 cups granulated sugar
1/3 cup water
1/4 cup honey
1 tsp lemon juice
1 1/3 cup sesame seeds
1/4 tsp salt
4 oz dark, milk or white chocolate, your choice. Either chip form or in small pieces

Toast the sesame seeds by baking on a clean baking sheet in a 350ºF oven for 20 minutes, stirring every 7 minutes or so.

In heavy saucepan, stir together sugar, water, honey and lemon juice. Bring to a boil over medium heat and cook without stirring. Brush down the sides of pan with pastry brush dipped in cold water, about every 5 minutes. The mixture will cook until medium amber in color and a candy thermometer reaches 310ºF, about 15 to 20 minutes. But just in case you need to know, I accidentally cooked mine to like almost 350ºF and it still turned out pretty good. Of course, I happen to like almost burnt stuff, so you know, just a warning.

Stir in the sesame seeds and salt. Immediately pour onto greased baking sheet, spreading with greased spatula. Mine didn’t quite fill my standard 1/2 sheet size pan. Using greased knife, score into 3″ squares, and then score each square diagonally in half.

While the snaps cool, melt about 4 oz of chocolate–either over a double boiler or in the microwave in 30 second intervals (Stir between each 30 seconds. It’s the lazy way to go…which is why I did it that way.) When it’s melted all the way use a fork to drizzle lines over the whole sheet of snaps. It’s OK if they’re not completely cool when you do the chocolate.

Let cool completely, and making sure the chocolate is completely set (pop it in the freezer for a bit if it’s not and you’re impatient like me), break along the score lines into triangles.

Like other hard candies, these will get sticky in very humid weather, but in a super air tight container they should keep for at least a week.

Half Birthday’s Aren’t Just for Kids

I know this guy. We get along pretty well, so sometimes we hang out. Usually we don’t get to hang out by ourselves, but that’s OK with us since the rest of the usual group can be fun too, since they’re our kids and all.

Anyway, this guy’s name is Joe, and today is his half birthday. Normally grown-ups don’t celebrate half birthdays but that is just a crying shame. This morning when he flipped the calendar page he realized the date and wanted to know if he could have half a birthday cake.

I think he was a little surprised when I said sure, but who likes to get their hopes up and then have them dashed? Certainly not me.

So I made him one. I cheated a little and used a cake that had been in our freezer, pretty much just waiting for the right moment to come along. One when it would be thoroughly enjoyed.

Slathered with buttercream, who can tell the difference anyway? Ok, so the buttercream was in the freezer too, colored a very garish yellow from Lilli’s first birthday. 

We also had a Thai inspired feast for dinner, to go with our chocolate cake. Most of the foods in the meal weren’t anything special because this week we are trying to kind of clean out our freezers and use up leftovers because Joe’s kind of a frugal guy. I had some leftover teriyaki salmon that I turned into fish cakes with some lime, ginger and some cilantro straight from the garden. And I had some lemongrass and half a container of tofu so I made a quick curry tofu soup with a little bit of coconut milk. Well, maybe a lot of coconut milk.

The soup came straight from my own brain. The fish cakes too, which is maybe why they weren’t very pretty–they ended up more like fish hash than cakes but oh well. I don’t know how to cook Thai food like a pro, but I do love to eat it so I think I at least have that going for me. The recipes probably aren’t that authentic, but they were pretty simple and that’s helpful if you’re also trying to entertain a silly silly little girl while making dinner.

The cake came from Fanny Farmer, a book I use very frequently. There’s something about the old recipes that I really love–they are classic, sure, but mostly it’s how they are written. They’re so matter of fact. I have to tweak them sometimes, but I don’t mind a bit. There are a lot of pages stuck together, and the gold hardcover is starting to break down in places, but that just shows how loved it really is.

Fudge Cake
Adapted from Fanny Farmer, 1965 edition
makes two 7″ or 8″ cakes

1/2 cup unsalted butter
1 cup sugar, divided use
1/2 tsp vanilla
4 oz good semi sweet chocolate
5 Tbsp boiling water
3 eggs
1 3/4 cup all purpose flour
1 tsp cream of tartar
1/2 tsp baking soda
1/2 tsp salt
1/2 cup milk

Preheat oven to 350ºF

Sift together the flour, cream of tartar, baking soda and salt. Set aside.

Cream together butter, vanilla, and 3/4 cup sugar until light and fluffy.

Meanwhile, over a double boiler melt the chocolate. Once it’s melted smooth add the boiling water and the remaining 1/4 cup sugar.

Add to the butter mixture. Next add the eggs, one at a time. Beat after each addition, scraping down the bowl as needed.

Add the flour to this mixture alternating with the milk.

Divide in the pans and bake about 20 minutes, rotating half way through. Check with a toothpick and give it 5 more minutes or so if needed. Cool completely before frosting.

The Results Are In: Marx Foods Capricious Chocolate Challenge

Update:  I didn’t win anything this time around, but thanks to all who cast a vote in my direction!

A couple of weeks can fly by so fast when you aren’t looking. Weeks filled with playdates, family holiday parties, Drs appointments and colds.

They’ve also been filled with testing. I was selected to participate in a contest Marx Foods was holding: to create an original recipe based on chocolate, using samples of ingredients supplied by them. I met the Marx Foods guys back at Will Bake For Food in November, and thought it would be fun to work on my recipe testing skills in a semi-high pressure format. What can I say, I do better under pressure. I did have a little trouble deciding what I wanted to make though, so could only narrow it down as far as 3 different recipes. Dear readers, you’re in for a little bit of a ride, but it’ll be worth it.


So, I’ve been busy testing out cookie batch after cookie batch. A little cookie made of humble ingredients that have been mixed up to be larger than the sum of their parts. A cookie that started out as one thing and quickly turned into something else, something better. I thought it would be pretty perfect to have a cookie recipe, since cookies are such a big thing this time of year. Am I right?


I also tested some créme brulées that ended up being pots de créme instead. And there’s also one savory dish, in case you don’t like dessert. (Who doesn’t like dessert?) More about those later, as first comes first. And if you like any of these recipes (or just like me) you can click the Marx Foods banner at the bottom to vote for me once the voting process has started!


Without further ado, here it is:


Mexican Chocolate Tea Cookies
makes about 32 cookies


These cookies are based on a common Mexican Tea Cookie, but also are based on a regular old Chocolate Crackle. They were inspired by the chilies included in the samples I got as part of the contest. 


8 oz semisweet chocolate, chips are ok but the better the chocolate, the better the cookie
2 oz unsweetened chocolate
1 cup brown sugar
3 eggs
1/2 cup plus 2 Tbsp vegetable oil
1 tsp salt
1 tsp baking powder
2 tsp chili powder (I used freshly ground dried Puya chilies from Marx Foods)*
1 tsp ground cinnamon
4 oz toasted ground almonds
7 oz all purpose flour
4 oz mini chocolate chips


Sift the flour with the baking soda and salt and set aside.


In a double boiler, melt the chocolates. When completely melted, add in the spices and sugar and mix to combine. Add the oil and eggs all at once and mix thoroughly. Next add the almonds, stirring with kind of a smashing motion to make sure that any lumps are broken up. Lastly, add the flour mixture and stir just until you see no more streaks. Let the batter rest until it is cool to the touch, then mix in the mini chips, otherwise they’ll melt.


Cover and chill for several hours in the refrigerator, at least 3. When you are ready to bake the cookies, preheat the oven to 350ºF, with racks in the lower and upper thirds.


Using a number 30 scoop, (or scooping about 1 1/2 Tbsp sized balls) portion the dough out, and place on a parchment lined tray. These cookies don’t spread much, so you want them to be nice and flat on the bottom and rounded on top, which is best achieved using the scoop. Leave about 2″ between each cookie.


Bake about 10 minutes, then rotate the pans, both top to bottom and spinning the pans front to back. Bake about 7 minutes more. They should be firm but not firm enough to lift off the pan while still hot. Let cool for about 5 minutes then remove to a cooling rack. Let cool completely before dusting with powdered sugar.

The rejects, which we gladly ate anyway


The best part about these cookies is that unlike a more traditional Mexican Tea Cookie, which are akin to a shortbread and must contain butter to taste good, these are parve (dairy free). If you keep kosher, that means that you can eat them as dessert following the main attraction:


Chocolate and Chili Braised Beef Short Ribs with Sweet Potato
serves about 6


The short ribs I used for this recipe are ones that came from the cow we bought back in summer. They were excellent, tender, flavorful and totally worth buying a freezer for. The sauce also goes great on the saffron roasted potatoes I served with the ribs. 


4 lbs 3″ beef short ribs with plenty of meat on the bones


For the dry rub:
2 Tbsp ground Puya chilies*
1 Tbsp ground Chipotle pepper
2 Tbsp cocoa powder
1 Tbsp salt
10-12 grinds black pepper


For the braising liquid:
1 yellow onion, chopped
2 smallish sweet potatoes, cut into 1″ rounds
4 cloves garlic
1/3 cup tomato paste
2 cups of your choice of broth (you might need more if your pan is bigger)
1 cup cold strong coffee
6 oz chocolate


Mix together the dry rub ingredients in a large bowl, and coat each piece of rib completely. Cover and refrigerate the ribs for several hours or overnight.


Heat a large (at least 5 qt) dutch oven with enough oil to just cover the bottom. Working in batches, brown each rib on all sides, taking care not to crowd the pieces so that they don’t steam themselves. Remove the ribs to a clean plate as you go.


Once all the ribs are browned, add in the onions and cook till translucent and starting to get a little brown, then add the tomato paste and garlic. Stir it around the pan, cooking it until it starts to smell like tomatoes, then add the coffee, being sure to scrape up all the browned bits that loosed up when you add the liquid. (Use a wooden spoon or other tool that won’t damage the surface of your dutch oven.) Add the sweet potatoes, and then the ribs, tucking everything in all together as best you can. Cover with stock and place in the bottom third of the oven. Cook about 2 hours, until the meat is tender. Remove the lid and cook another 1/2 hour more, letting the liquid reduce down.


Remove the pan from the oven and then remove the ribs, discarding any bones that fall slip out. Place the ribs in a bowl, and strain about 3/4 of the sweet potatoes and onions out of the broth. Let the broth rest for a few minutes and spoon off any excess fat that rises to the top. Add the meat back in, bring to a boil, then reduce the heat and let simmer on the stove for about another 1/2 hour, tasting for spice. When I tasted mine, I kept getting a hit of spice at the back of my throat that led me to believe that it would be pretty hot, but it wasn’t as strongly flavoured as I feared once we were eating it with all the components together. In the last 15 minutes or so of cooking, add in the chocolate. Be sure and stir it up so the sauce reaches a nice smooth consistency, but then add back in some more of those sweet potatoes for a little bit of texture.


Serve immediately, with a little sour cream on the side to cool the heat, if you want it. (We used Sour Supreme)


Of course, if you’re not worried about having a parve dessert after your dinner, you could always serve the next recipe instead. They started out as créme brulées, with the intention of using the coconut sugar to make the crust on top. Turns out, it was too moist and brown a sugar to work well and mostly just burned instead. Well, since the texture of the pudding itself had been closer to a pot de créme anyway, I just went down that road.  

The original créme brulées


Fennel & Chocolate Pots de Créme
makes 6-8


1 1/4 cup heavy cream
1 1/4 cup half & half
7 egg yolks
4 Tbsp coconut sugar*
2 Tbsp granulated sugar
1 vanilla bean, split and seeds removed*
6 oz good quality dark chocolate, chopped
1 Tbsp fennel seeds
2 tsp fennel pollen*


Preheat oven to 300ºF


In a medium sized, heavy bottomed pot, toast the fennel seeds until they are fragrant and starting to brown, just a couple of minutes. You’ll want to watch them carefully as they will burn easily. Using a wooden spoon, crush the seeds up a bit. Next, add the fennel pollen, vanilla bean, cream and half & half and heat until it almost reaches a boil. Turn off heat and add chocolate. Let this mixture steep for 15 minutes or so, until you can smell the fennel just the faintest little bit. If it smells stronger sooner, continue with the next steps.


While the chocolate mixture steeps, combine the sugars and the egg yolks in a large metal bowl.


Next, bring the chocolate mixture back to a simmer while stirring continuously (do not boil, or you risk burning the chocolate). Strain this mixture into the eggs yolks, and then whisk until fully combined. Pour into 6 small cups or ramekins, each at least 6 oz. You could also use smaller dishes and make more servings, as it’s a rich dish for some palates.


Cover each dish with foil and place in a high sided roasting pan. Place the pan in the oven on the middle rack and pour enough water into the pan to reach 1/2 way up the sides of the dishes. Bake for 30 minutes and check for doneness. Mine needed just about 7 more minutes after that. The crémes will be set around the edges but just barely so in the middle. Cool completely, and sprinkle just a pinch of coconut sugar over each one before serving, it lends a nice little crunch.


* These ingredients are the ones that were supplied to me by Marx Foods as part of the contest.

The Goodies

Recently I decided that my plate wasn’t quite full enough and that I should take up a new hobby. One that people get obsessive over and do for ever and ever and love.

Knitting.


Yeah, I know. It’s kinda cliche and all that, but honestly, I have this little cutie who totally deserves to have all kinds of awesome things knitted for her, but not too many people to knit them but me. Things like this. Or this totally awesome berry pie hat, which by coincidence was just gifted to Lilli the same day as knitting club, a late birthday present from our friend Meghan.


The knitting club I joined is pretty low pressure if you can ignore the fact that we usually refer to it as a cult. It’s with people I was already well acquainted with, so I knew I would fit right in and be comfortable getting help. So far I’ve been to just 2 meetings, but there’s only been 3 since this group even started, so I’m off to a good start with the socializing part. The knitting part is going to take some time. At this Wednesday’s circle I discovered that I was actually knitting totally wrong but somehow came out with the right result. What can I say? I’ve got skills.

Last week there was some delicious white chocolate covered popcorn with cranberries that I ate way too much of. Especially considering that I was eating caramel corn every day. And the fact that it was covered in sticky melty white chocolate. Not exactly the best thing to have coating your fingers when you are trying to use them to hold onto yarn and knitting needles, but that did not stop me from eating too much anyway. There was also some ginger cookies made by the friend who started the group, and they too were addicting.

It’s a good thing I finally started that sit-up challenge this week, because I have been eating too much.


Anyhow, for this weeks meeting I decided that I should make a treat, since that’s what I do best. To get into the spirit of the season (most everybody else’s season, that is) I made delicious brownies. With, you guessed it, candy canes.


Normally my go to brownie recipe is the one from the cookbook put together by the founders of Chocolate Bar in New York, but I wanted to make a double batch and that would have required more eggs than I was willing to spare (eggs are in short supply around here lately, as most of the chickens are molting so they aren’t laying much).

I did a little searching and ended up basing them off of a recipe from the book Bittersweet instead. They are pretty much the perfect brownie, even without the addition of candy canes. If you like your brownies fudgy but not too moist or sticky, these ones are right on target, with an ever so slightly crackly crust and the right amount of chew.


I made them with Hershey’s Special Dark Cocoa which I purchased out of curiosity. It’s responsible for the deep rich black color of the brownies, which I absolutely love. Somehow it just makes them taste better knowing that they look like a galaxy of candy cane stars.


In the end, I had to pull apart my scarf about 3 times over the course of the evening. One time for each brownie I ate. Oh well, at least I’m good at baking.


Peppermint Galaxy Brownies
adapted from the book Bittersweet by Alice Medrich
makes 16 roughly 2″square brownies, easily doubles

10 Tbsp unsalted butter
1 cup sugar (original recipe calls for 1 1/4 cups)
3/4 cup plus 2 Tbsp unsweetened cocoa powder, any type is fine but I used this
1/4 tsp salt
1/2 tsp vanilla extract
2 large eggs
1/2 cup all purpose flour
1/2 cup crushed peppermint candy canes, plus extra for the top

Preheat oven to 325ºF, with a rack in the lower third of the oven. Line an 8″ square baking pan with parchment paper, letting it overhang on 2 opposite edges.

In a saucepan over medium heat, melt the butter without browning. Remove from the heat and add the sugar and salt and stir until well combined. Add the cocoa powder and vanilla and combine till it forms a thick paste. Add the eggs one at a time, and beat with a wooden spoon or a spatula after each addition. Add the flour and stir until you don’t see any streaks of flour, then beat for an additional 40 strokes. About 20 strokes in add the crushed candy canes, and finish combining.

Spread batter in pan. Sprinkle on some more candy canes, as many as you like. Don’t go too heavy–you want there to be a balance of chocolate and peppermint. Bake about 20-25 minutes, until a toothpick inserted in the center comes out with some batter stuck to it, but not totally glopped on.

Cool completely on a wire rack. Use the edges of the parchment paper to remove from the pan. Cut with a sharp knife, wiping clean on a damp rag before eat cut.

It Comes Natural

I don’t think I’m a natural born writer. I’ve never been one to keep a journal, and even keeping up a blog once a week or so is tough for me. I just never feel like I need to write. Take pictures or eat a cookie, sure, but writing is something I have to put a little effort into.

But there are things I can say I am a natural at. I am a natural blonde. I am a naturally good swimmer. I have a natural green thumb. And, I like to think that I am naturally gifted with a sense for what tastes good together, and also for having a sense for what a set of ingredients will taste like once they are combined. This last week a friend commented that he thinks I have really honed that sense of taste, which was a very sweet compliment (Thanks Mike!) and also got me thinking about if I am using that skill to it’s fullest potential. 

I want to hope that I am, but in reality I probably am not. I mean, are any of us really using all of our skills to their fullest potential? Not if we are being honest with ourselves.

But the good news is that that means we have potential that is untapped, right?

I don’t mean to give a pep talk, but I guess I am feeling like I need one myself. I have recently had a lack of passion for what I do with food. It’s such a big part of my life, both for pleasure and necessity, as well as what I do for a living, that I guess I have lost a little bit of the magic. Lately, It’s been hard for me to get excited about food. As they say, this is probably a #firstworldproblem, but it’s my problem and it has been putting me into a sort of melancholy.

So to help me get out of my funk and to hopefully get me out of my “I’d rather stay home and not talk to any strangers” comfort zone a little bit, I’m going to be baking for a good cause. Next weekend is the Will Bake For Food bakesale, and I volunteered to bake some goodies and hang out at the sale for a while. There will be lots of other, much more well established bloggers (that’s where the nervousness about talking to strangers comes in!), and everyone will be contributing something delicious for you to take home.


This past Friday I ran a test for what I thought I might make and while it was very good, I think I’m going skip it in favor of something a little less fussy. It was a twist on something I dreamed up a few Thanksgivings ago–a dark, creamy pumpkin ganache tart–that turned out to be just too rich for it’s own good. I wanted to make it lighter and less intimidating. So, I turned it into a mousse, letting those amazing taste buds guide my stirring hand. 

I hope I get my mojo back soon, because it makes me feel a little heartbroken to be missing it at this time of the year, when so much revolves around breaking bread with others. In the meantime, I guess I’ll take someone’s (my husband’s) sage advice and “fake it till I make it.”


Pumpkin Mousse Pie
serves 8-12

For the filling:
11 oz ganache, melted but cooled
1 pumpkin puree
1 cup heavy whipping cream
1 tsp ground cinnamon
1/4 cup sugar
pinch salt

For the crust:
1 cup hazelnuts, oven toasted and skins removed.
1 cup cake or cookie crumbs, toasted. Graham cracker crumbs would also work.
2 Tbsp sugar
1/4 cup melted salted butter

For this recipe you will need an 8″ or 9″ springform pan.

For the crust: 
Preheat oven to 375ºF.
In a food processor, grind the hazelnuts until they resemble crumbs. Add the cake or cookie crumbs and the sugar and pulse to combine. Pour into a bowl and mix in the butter. I like to use regular salted butter for this, I it helps the hazelnuts a bit. You can use unsalted if you prefer. Press into your pan and using a small measuring cup or juice glass, press some of the crust partially up the sides of the pan, making a thin crust. Bake for about 20 minutes, and let cool completely while you mix the filling. 

For the filling:
When the crust is ready, assemble your mousse. Stir the pumpkin and cinnamon into the ganache. You might want to add more cinnamon if you really like that flavor combo, as what I have here is very delicate. Whip the cream to a soft peak then add the sugar and salt and whip till it holds a firm peak. Next, fold in a bit of the ganache mixture. Then pour the cream mixture back into the ganache and fold until you see no streaks of either cream or ganache. Pour it into your mold, and level with a small offset spatula or the back of a spoon. Chill for at least 2 hours before serving.

A note about the ganache: I often have ganache in the fridge leftover from other baking projects and this was one of those times. If you aren’t the type to have such a decadent leftover, you can make it from scratch easily using a recipe I’ll give you below. We like to warm it a little bit and smear it on a graham cracker as a sweet treat, or put it into heated milk to make a delicious hot chocolate…

Semi-sweet ganache:

10 oz good quality semi-sweet chocolate, chopped into pieces about the size of an almond
1 1/2 cups heavy cream
2 Tbsp unsalted butter

Place the chocolate and butter into a heat safe bowl. Using a heavy bottomed pan, heat the cream just to a very light boil and immediately pour over the chocolate. Let it sit for several minutes and then with a whisk, slowly incorporate the chocolate and cream. Start in the middle of the bowl and use very small movements, gradually working your way to the outer edge of the bowl. This helps to minimize the incorporation of air into the ganache for a smoother finished product, which is helpful if using it as a filling or icing.

Bare Bones

What’s a girl to do when she wants to make a tart and her flour bin looks like this?

Well, she could experiment with some of that gluten free flour mix in the cupboard, or she could find a recipe that calls for some other obscure flour. Or, if she has already made bagels that day and is feeling sorta lazy after that, she can reach deep into the freezer and pull out a patty of chocolate short dough the origins of which she can’t quite recall. It can’t have been in there that long, right?


And then, she will take out a pound of fresh black figs, but in so doing realize that there is a disturbing lack of ingredients for pastry cream in her refrigerator. This is, again, the bagels’ fault. She was making bagels instead of going to the grocery store. 

This is what happened to me yesterday. I wanted to make something like this tart, but I wound up making my own instead.  I impulse bought some figs at the end of last week, and they have been waiting for me to be inspired. Well, inspired to do something with them, the figs. I’ve done plenty of other things since they made their way into my kitchen. Like make lemon curd frozen yogurt, and go to an awesome cookbook club picnic. But those are altogether different stories. 

Back to the figs.

I grew up in a house with a huge fig tree in the front yard. I mean huge. So huge we would have to go up on the roof to pick the figs. Birds always ate them, and my mom would sometimes pick them and sell them to an organic juice bar near Greenlake. I have vivid memories of my mom running out onto the porch during the day to try and scare the birds away. It was pretty futile, but I think it made her feel better. Our figs were green–my mom always said they were Adriatic figs. 

Ours was like this, but about 3 times bigger. Photo courtesy Route79 via flickr.

I don’t really know how we had such a prolific fig tree, being in Seattle (Yes, I’m a Seattle native. It’s OK to be jealous…), but we did, nevertheless. There was always way more figs than we could do anything with, and I don’t really remember anybody but me ever even eating them. I do remember some failed teenaged attempts at making fig type bars, but I guess I had some learning to do in the kitchen department. 

I do still love figs. I almost always keep some dried ones around, and when summer comes I like to eat them fresh with honey and yogurt, or some other tangy dairy thing. So yesterday, with these figs in hand and the mystery chocolate dough thawing on the counter, I got to work. 


Since our chickens are kind of…not really laying a lot right now, for some mysterious reason…I am short on eggs. I couldn’t make any fancy fillings from scratch. But I did have some thick, molassesey pecan pie filling that I saved from a big batch I made for a dessert tasting. I know, I know. Right now you are thinking, that sounds…terrible. I know that you are thinking that because I thought it too. And then I thought about chocolate and pine nuts, and then I thought about food processors and that lemon curd frozen yogurt…

And then I made a delicious tart. 

We ended up eating the tart all by itself, because by the time we sat down to eat it I was so excited/curious/nervous to try it that I had forgotten all about the frozen yogurt. Maybe tomorrow.

Fig and Chocolate Tart
serves 8

For the dough: (adapted from The Professional Pastry Chef by Bo Friberg)

4 oz granulated sugar
14 oz unsalted butter, at room temperature
1 egg
1 tsp vanilla extract
1 lb 2 oz bread flour
2 Tbsp unsweetened cocoa powder

This recipe makes quite a bit of dough, so if you want to cut it in half, use only the yolk from the egg. If it’s a touch dry, add a little water, just a tsp at a time, until the dough comes together.

Sift the flour and cocoa powder together and set aside. Mix the sugar, egg and vanilla on a low speed using a dough hook, just until combined. Add the dry ingredients, and mix until just smooth. Press dough onto a parchment paper lined baking sheet, cover, and refrigerate for at least 1 hour before using to allow the flour and butter to really meld.

To prepare the shell for baking, use a patty about the size of a large hamburger bun. Let the dough warm up a bit, and roll it out until it is about 1/2 cm. thick. Gently transfer the dough to your tart ring (on a sheet pan lined with parchment paper) and press it into the sides as you rotate the pan slowly. Instead of cutting off the scraps, carefully press the overhang down into the sides of the pan. This will give the sides a little bit more strength and make them less likely to break when you remove the tart from the ring, since the crust is very delicate. Put it into the freezer for about 10 minutes while you heat the oven and prepare the filling.


For the filling:

1 lb fresh figs
1/2 cup pine nuts
1 cup semi-sweet chocolate chunks, or chop your own from a favorite bar
1 cup of your favorite pecan pie filling, preferably one with some molasses in it

Heat the oven to 350º F. Rinse the figs, and trim off the stem end. Quarter them and toss them into your food processor. Pulse for a minute until the smallest pieces are about the size of a black bean . Add the pine nuts and pulse a few more times. You don’t want the filling to be a paste–the nuts and fig pieces should still be recognizable as what they are. 

Put the filling into a bowl and stir in the chocolate and pecan pie filling. Pour it into your shell and put it straight in the oven. Bake about 35 minutes, or more depending on your oven, until the filling is set in the middle.  Remove from the oven and place the sheet pan on a rack to cool completely. 

If your tart pan has a bottom disk (unlike mine) you are in luck because it will be very easy to get out! Just slowly press the bottom upwards until it is free of the ring, and, using a pancake flipper, gently slide the tart onto a cake plate. If it doesn’t, put a piece of parchment paper on top, then a cutting board. Flip the whole thing carefully over, take off the ring, then flip it back onto your plate. Applaud for yourself if your tart is in one piece.