Kicking it into High Gear

I don’t really know where to start. It’s been a long long time since I sat before this screen with this empty blog-post form in front of me.

Too long.

I’ve been very hard at work on my new project and it’s been very rewarding. But also a big big time user-upper. So much so that when I stopped by here just the other day, I couldn’t believe that it had been almost 2 months since I posted anything at all, and even longer since I put up a real recipe.

Today is not the day when I come back, raring to go with a bellyful of recipes, though I do anticipate having slightly more for that time in the near future. Fingers crossed.

Today is the day that I take a quick moment of your time to hype the truck and ask for your support so that we can get rolling.

I like to think of the truck as a natural extension of the recipes I’ve been sharing here for over a year. They’re fresh, natural and as whole as possible. They taste good, and they feel good to eat. They make me happy.

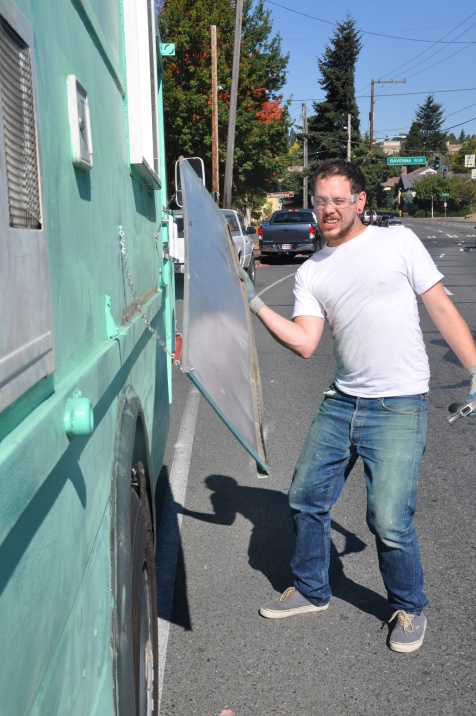
The truck itself makes me so happy, I could burst. When I see the bright green paint and the quirky smiling front end, I feel giddy, and I want that feeling for everyone who eats our food. I want to take that good feeling and spread it all over the Pacific Northwest that I love to call home.

But first, we need to get started actually serving that food.

After an incredibly successful summer full of new friends and happy bellies, we’re headed into the final stretch. We’ve put together a project on Kickstarter that you should check out. If you can support the project financially, that’s awesome. And if you can help us spread the word so that our campaign is a success–that’s even better.

Head over to the project page on Kickstarter and take a look, then tell everyone who loves good food, the Pacific Northwest, and community to take a look too. Because that’s what this project is all about.

Return From the East

Well, we survived our trip. Israel was a whirlwind of delicious food and kind hearts. Ten full days of heat and love.

We got back a week ago and since then I’ve harvested honey, made 20 quarts of pickles and even more of jam. It’s only a fraction of what we’ll need once the truck starts rolling so it’s back to work soon enough. But I wanted to share some highlights from our trip and give you some leads in case you’re working out your menu for Rosh Hashanah like I am.

We spent the first half of our trip in Jerusalem, staying in an apartment in a mostly residential neighborhood. It delighted Lillia to see so many kittens everyday, and the pigeons and doves were never safe from a good chase no matter how hot and sweaty she got. We spent time walking in the neighborhoods and parks and markets, and did a little bit of shopping but nothing extreme. Neither Joe or I are good at haggling so I usually just walk away empty handed rather than attempt to haggle and then get overcharged. I’m working on it though. Next time…

Since we were there for my sister-in-law’s wedding, we did have obligations but not many. Lillia was the flower girl, which only required her to be cute–something she pretty much never fails at. We had family meals some nights, and one night we were there we celebrated my 30th birthday with pizza and pasta and tiramisu.

The wedding itself was held in the gorgeous desert hills of the West Bank. We danced all night, drank and ate our fill, all while the sun set and the moon rose and the warm wind washed over us.

For the second half of the trip we were in the north part of the country–the beautiful Galilee region–on Kibbutz Sasa, where the groom grew up and his family still resides. It was glorious. A bit cooler than the city, and with a pool who could complain? We visited with animals, ate pomegranates right off the tree, and took a day trip to the coastal city of Acre–Akko in Arabic. It’s a city with a large harbor and a long history, and it was blisteringly hot.

We had most of our meals in the chadar ochel–the dining hall–and the rest in small Arab or Druze towns neighboring the kibbutz, so I never cooked. The food was of course spectacular. Salads beyond count, partnered with multitudes of olives, dips, spreads and fresh cheeses. Pita like you’ve never had here in the states. Savory meats and rices and pastas.

I’m missing it all, contenting myself with plates of cut veggies slathered in tahini. But it’s the pomegranates on the tree I am wishing for now. Rosh Hashanah is a holiday where that food is eaten by tradition, and how much better would the many seeds taste if I had picked them myself?

For this year’s festive meal, we are eating at our house. We won’t be enjoying the meal surrounded by breathtaking views of the dessert, but I wanted to include a lot of flavors inspired by our time in Israel, as well as the traditional foods of the holiday–honey, pomegranate, apple. It’s usually a meat meal, so I am sticking with that and making a humongous pot of meatballs like ones we had while staying on the kibbutz. And, since the holiday is a herald of the Autumn season that is slowly making it’s way to our doorsteps, I’ll be including those foods too.

Sunday I’m missing yet another cookbook club meet-up to host dinner and attend services, so I’m using recipes from Ottolenghi’s book Plenty which is the book for this month’s meeting. It’s perfect actually, since he developed his palette growing up in Isreal and uses a lot of middle eastern flavors in his dishes. I’m making a crisp bean salad and tender pumpkin slices coated in a crackly panko breading. I may grace the table with an eggplant dish too, but haven’t decided yet for sure.

If you’re looking for inspiration for your holiday meal, there are lots of good recipes to be found on the web. Some I’ve been looking at from The Shiksa in the Kitchen‘s Tori Avey, and some from kosher cooking guru Jamie Geller‘s site Joy of Kosher. But the NY Times has the best. They’re mouthwatering to look at and I’m thinking I can squeeze a couple onto our sure to be overloaded sideboard.

For Sweetness

Sometimes it’s hot and you still need to turn the oven on and BAKE things.

Sometimes you read 2 dozen recipes and none of them are the one you want to use.

Sometimes you want to slap yourself in the face for not being better to yourself.

Sometimes you just need a little sweetness in your life. (But not toooo much.)

And sometimes, you have too much zucchini.

Yes, I’m talking to you, because I didn’t plant any this year. (But if you have extra, I’ll take it off your hands…)

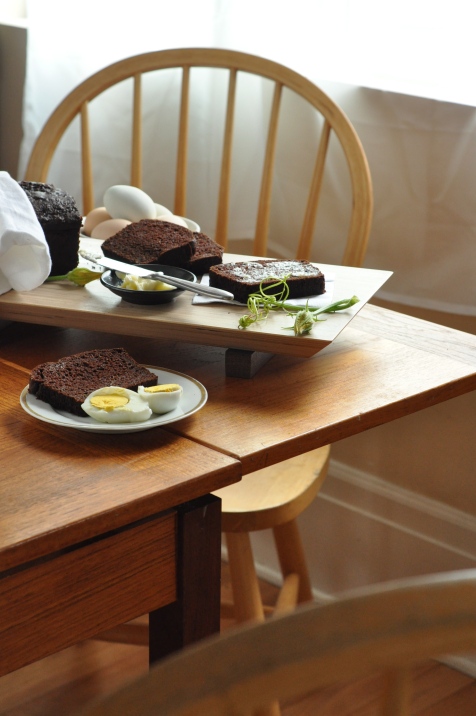
This recipe was born from all of these sometimes. It’s not zucchini cake, which is what most of the world is really making when they say “zucchini bread.” It’s a bread for toasting in the morning, or putting a scoop of ice cream onto in the evening without getting a totally insane sugar high that prevents you from going to be bed at a decent hour.

It’s chocolatey and subtly spiced, with a moist but toothsome crumb.

And! It makes 2 loaves! That means there’s one for you and one to take down the street to the neighbor who keeps mowing your lawn for you out of the blue, or to leave for your house-sitter to ensure the pets are well loved while you are half a world away.

1 1/2 cups whole wheat flour
2 cups all purpose flour
1/2 cup cocoa powder
1 1/2 Tbsp ground cinnamon
2 tsp baking soda
1 1/2 tsp salt
1 1/4 cup sugar
3 eggs
10-12 oz zucchini, grated. (about 2 cups)
1/4 cup oil
1/2 cup any type of plain yogurt
1 cup unsweetened applesauce
1/2 cup or so of water

Preheat oven to 375ºF.

Whisk together all the dry ingredients, including the sugar. In a separate bowl, mix together the eggs, oil, yogurt, and applesauce until smooth. Add the liquid to the dry and mix until just a bit of dry flour remains. Then add in the zucchini. Mix it all in, adding just a bit of water at a time as needed to make it easy to work with. You don’t want it to be too wet.

Divide into loaf pans prepared with baking spray, butter and flour, or parchment paper.

Bake for 35 minutes, then rotate and bake for 10 to 15 minutes more, or until it passes the toothpick test. Let cool in the pans a bit, then turn out onto a rack to cool the rest of the way before slicing. Stores great in the freezer in individual slices or whole loaves.

Go Big Or Go Home

I have about a million things I want to share with you. Recipes, photos, ideas. I’ve been working on Thanksgiving and summer at the same time, and a million other things.

I’ve been making jam, and getting ready for pickles season to begin in earnest. I’ve been drinking a lot of delicious smoothies and unsweetened coffee. I’ve been working on my tan and somehow finding time to read the books I’m obsessing over (while brushing my teeth, while stirring the jam, etc.).

I’ve been cooking a lot of recipes from Yotam Ottolenghi’s book Plenty, and it’s going a long ways towards building the anticipation for our upcoming trip to Israel. I like to think it’s what’s been keeping me on track with getting my eating habits back in order. I’m also hoping that Lilli decides she really likes Israeli food because right now she is being a super picky toddler and it’s Driving. Me. Crazy.

I’ve been berry picking at least once a week for the last 3 weeks with quarts of frozen berries to show for it, and I’ve been harvesting fennel pollen like crazy so far with little success. Not sure what’s up with that.

The truck has been taking a lot of my time. Between getting it all gutted and looking at appliances, scouting the markets looking for likely vendors for our raw ingredients, catering weddings, and recipe testing, it’s been a busy month indeed. I hope you don’t hate me for neglecting you, but a very wise friend once said to me “never apologize” so I’m not going to. I’m just going to tell you that it will all be worth it in the end.

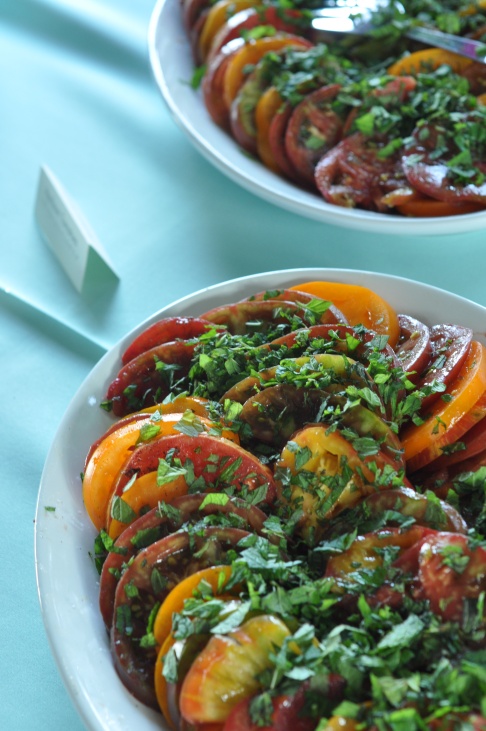
Those tomatoes? They are the best. We served them at the wedding we catered last weekend (for which I also did the cakes–yes, 4 of them–and am kicking myself for not taking time to photograph). I got the recipe from Ashley Rodriguez who writes Not Without Salt, and it’s the best way to eat heirloom tomatoes that I have ever come across in my whole life. I can’t wait for all the tomatoes in the front yard to start getting ripe so I can devour them bathed in fragrant vanilla. They’ll probably all start getting ripe while we’re in Israel so my sister–who’s house-sitting for us– will be the lucky one who gets the first harvest.

This week James (my biz partner) and I put up about 40 lb worth of nectarine jam. It’s divine. It’s chunky and fruity. I can’t wait to serve it on some warm toasty skillet cake in a cozy little brown box off the truck. I can’t wait for that window to slide open with a sign hanging next to it that says “Come and get it!”

In the meantime we’re preparing for back to back dinners this weekend–our first matched set. We’ve been selling them all out, and are planning a brunch in September that we’re super excited for. There are few spots left for each date next month, so if you’re interested you should get on the list ASAP.

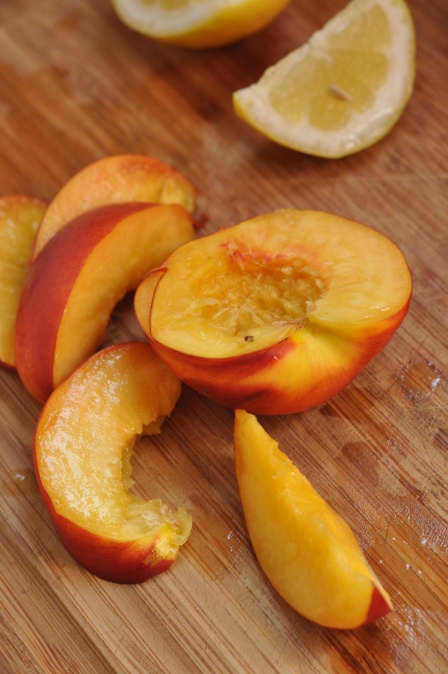
This is what’s been on my mind for the last 2 days, though, so I’ll share it with you. We’ve been eating a lot of nectarines lately–I think they’re way better than peaches, and consequently can’t get enough of them. Neither can Lilli. She’s been eating like 3 a day, if she can get away with it. This incarnation of jam is very simple, though it does require some patience. If you don’t want to spend so much time slaving away, you can always make a berry jam and just add the lemon zest to that as well, it will be just as nice.

Nectarine Jam with Lemon

6 heaping cups nectarines cut into 1″ chunks
3 cups sugar
zest from one organic lemon plus juice

Add the fruit, sugar, and zest to a large heavy pot over high heat and stir it all up. Bring it to a rolling boil, stirring occasionally. Once it’s really boiling, set a timer for 30 minutes and come back to stir it every couple of minutes. Towards the end this becomes almost constant stirring–you don’t want to fruit to start sticking to the bottom of the pan or all the sugars will burn. After 30 minutes, turn off the heat and add the lemon juice. Put into hot sterile jars and process 15 minutes in a water bath for pint jars. This batch will make about 3 pints with a little bit leftover for your toast the next morning.

The Mistake

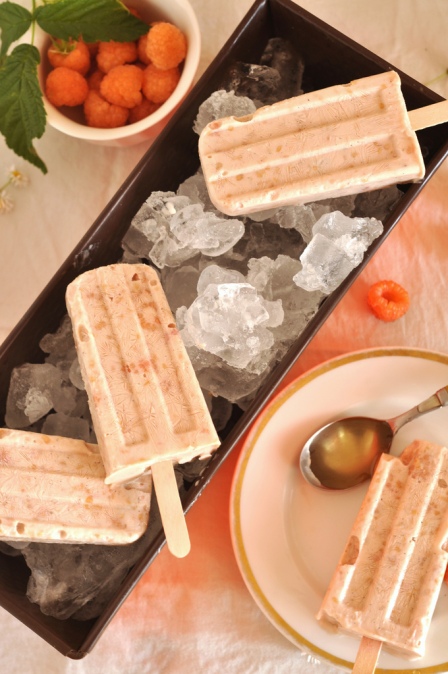
What happens when you take a bowl full of raspberries, a big drizzle of honey, and some greek yogurt and mix them together?

You should get some delicious popsicles, if you know what you’re doing. Which apparently–some days–I don’t.

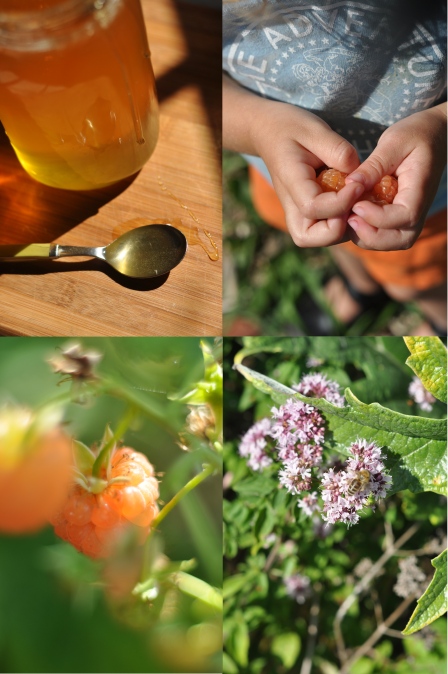
I was super stoked about making these popsicles. I even talked about it over on Facebook. I decided to make raspberry and honey with greek yogurt when we got to the P-patch and saw the berry bonanza going on in my plot, and remembered the jar of deliciously floral honey we picked up in Manson when we were visiting Lake Chelan a few weeks ago.

I don’t really know what went wrong. They had all the makings of what should have been a killer batch of delicious popsicles.

Then I added some liqueur to them, which I think is where it all went downhill. Even the heady scent of good vanilla couldn’t save the day.

Usually adding a bit of booze to things is a win. With these babies though, it turned the texture to weird creamy with bits of straight up ice lodged throughout. Between the ice and the seeds in the whole berries, they were too much crunch and not enough creamy goodness. And to make matters worse, the liqueur had a weird flavor when it froze–supposedly raspberry but more like rotten grape juice.

I know, this is really making your mouth water. I bet you wish I would give you the recipe to make these tempting delights.

But, lesson learned. I mean, I did it for you, friends. I made these popsicles so you wouldn’t have to, and now we all know what happens when you mix these things together and freeze them.

Sometimes, you have to just take the things that come to you. Lately, I’ve been getting a lot of lemons. I guess that’s why I made lemonade. It’s been a lot of hit and miss these past few weeks and I’m happy to say that I have been doing my best to move on. I’m getting back on the bandwagon of deliciousness, with recipes forthcoming that a girl can be proud of.

I might still be battling the chickens to stay in their designated area. I might still be neglecting the p-patch only to show up and find that someone has stolen all of the best artichokes off of my plants. I might even continue to pretend that the weeds aren’t getting as tall as Lilli, but at least I will be taking the time to enjoy the rest of summer while it still lasts.

And with any luck, I’ll be making more popsicles. Like these ones. Or maybe these.

Or maybe, these. Hopefully they will redeem me from the circle of hell reserved for people who mess up that easiest of summer treats, the popsicle. I made these ones after realizing I still had a quarter of a watermelon in the fridge that I didn’t want to eat in it’s current form.

They are a snap to make and are highly refreshing. Not as picnic friendly as whole watermelon, but are perfect for a night on the porch with friends.

Watermelon Margarita Popsicles
makes about sixteen (16) 1/4 cup popsicles

about 4-5 cups watermelon chunks–seeds removed
1/4 cup good tequila
1/4 cup simple syrup, chilled
1/2 cup fresh squeezed lime juice

Puree the watermelon. You’ll need 3 1/2 cups of juice for this recipe, which you should get from 4-5 cups of solid watermelon, but if you need more juice, puree more melon until you have enough juice. If you happen to get more than 3 1/2 cups, just save it for something else. Non-frozen watermelon margaritas perhaps.

Add the syrup, lime juice and tequila and give it a good stir. Carefully pour juice into your popsicle mold, cover and add the sticks. Freeze until solid then run a thin stream of warm water over to remore. Store frozen popsicles in a zipper bag and freeze the remaining mixture. Before serving sprinkle a tiny pinch of crunchy sea salt over one side of the popsicle for a true margarita experience.

All the Fun

The second half of July whizzed past me. I cannot believe it’s already August (my birthday month, yay!) , and it’s going to be another insanely busy month. I’ve been having all the fun and am not stopping anytime soon.

Though sometimes, I need to just sit still for like 30 seconds and make sure that I am taking time for myself. Lately, I haven’t been doing a good job of that and reached a point of near exhaustion.

This week, I’m back on track and being good to myself in a way I haven’t been in a long time, even though it’s really really hard.

I started back up again keeping a food journal, which I’ve found to be the only effective way for me to be accountable to myself for what I eat and when I am physically active.

This isn’t a diet blog, it’s not even a healthy lifestyle blog. It’s a blog about food and I have to stay true to that. I love to eat (and drink) but it’s been getting me into trouble lately because I haven’t been paying any attention to what I’ve actually been consuming. Being busy does that to a person.

So this week while I’m getting over the cravings hump, I am just going to share a few little things.

I made this killer lemon syrup last week using coconut sugar and sugar I made with pomelos. The syrup was used as a base for jelly shots that were consumed at kickball. (Which I’m both elated and totally depressed is finally over for the year.)

It goes really well in just about any beverage though, provided it’s cold and refreshing. Paired with just ripe nectarines and sparkling water it makes for a very refreshing afternoon pick-me-up, with a smooth transition into happy hour–should your day need one of those–by adding a jigger of vodka and a crushed mint leaf or two.

Sparkling Nectarine Lemonade

For the Syrup (makes about 2 cups)

1 cup lemon juice from a bottle
1 1/2 cups sugar–any kind will do, but using half coconut sugar added a nice earthy flavor
3 lemons cut into 8ths, juice squeezed out
1/2 cup or so of water

Put all ingredients into a large, non-reactive pot and bring to a boil. Simmer for several minutes until the syrup starts to thicken a bit, then strain out the solids. Stored in a jar in the fridge, this syrup should keep for a several weeks.

To make the lemonade just pour a little syrup into a glass–about 1 tbsp for a not very sweet 8 oz or so of sparkling water–then smash a couple of slices of ripe nectarines into it. Add a squeeze of lemon for extra brightness, and put in some ice if you like. Then top with sparkling water.

Missing the Beat

Last week so much time was spent on kickball and on Friday’s dinner (drool over the menu here) that I hardly had time for anything else. It went by in a rush. It took me until today to get caught up on emails and gossip. I was seriously behind, and realistically, it’s only going to get backed up again. That’s just how summer rolls.

This week, we’re gonna try to take it easy and eat a lot of popsicles. It’s the only week of the summer where both boys are home for the entire week and there aren’t any camps or plans with grandparents, and we’re headed to Eastern Washington–to sunny Lake Chelan–at the beginning of the weekend.

We stay in a little time share condo that Joe’s been going to with his family since he was a kid. It’s small–barely enough room for all of us, with a little poorly stocked kitchen. This means that we eat a lot of meals that are easy to prepare and require a minimum of devices and gadgets and pots and pans. I don’t like to bring a lot of things with us, since with 5 of us in the car it gets pretty full pretty fast.

I do like to bring a lot of pre-planned and pre-prepared foods to reduce the amount of time spent in the kitchen or at the store for forgotten items. When I’m on vacation, I wanna be on vacation, dammit!

So, I’ve been thinking about it for a few days and what I’ve come up with stinks. I’m totally out of ideas and I can’t stand to look at Tastespotting or Pinterest any more than I have to. I don’t want to eat pasta or tacos every night, even though I do love a good taco bar.

I’m calling on you, dear friends, for some advice. I’d love to hear your favorite easy to prepare meals for weekend getaways in hot locales. We like to keep it fresh and simple with lots of veggies; not a lot of spice since the kids are kinda picky; and of course, kosher.

If you’ve got any bright ideas, share them here and let’s see what we can come up with!

Champions

This week, we beat the only other undefeated team in our kickball league.

Don’t misunderstand me though, we have never actually won a kickball game, at least not this season. What we do best is tease or “taunt” the other team. (It’s sort of hard to explain. There’s lots of costumes, good natured ribbing, and drinking involved in our kickball league–we have an extraordinary amount of fun.)

My costume for kickball this week included some Mayan inspired make-up and a feather headdress. Photo credit Jillian Mednick

We’re a creative bunch, and the beginning of the week was spent gluing feathers onto headbands and spray painting liquor boxes gold. Wednesday was the big stand-off, and we came out on top. It was an awesome feeling: being at your best and getting recognition for it.

What all this creativity means though, is that I spent the week away from the kitchen and so I didn’t have much to share with you all. I managed to squeeze in some gardening time, pulling out bolted cilantro and harvesting peas, and filling in a few bare spots with veggie starts picked up on a whim. Nothing notable happened in the eating department though–mostly just nachos and salad.

We’re hosting another dinner tonight, and just sold out the next dinner (Aug 24th). This week might be the best menu yet: grilled whole trout, corn chowder, salad with beets and fresh ricotta. Lemon balm ice cream for dessert, with plum coulis.

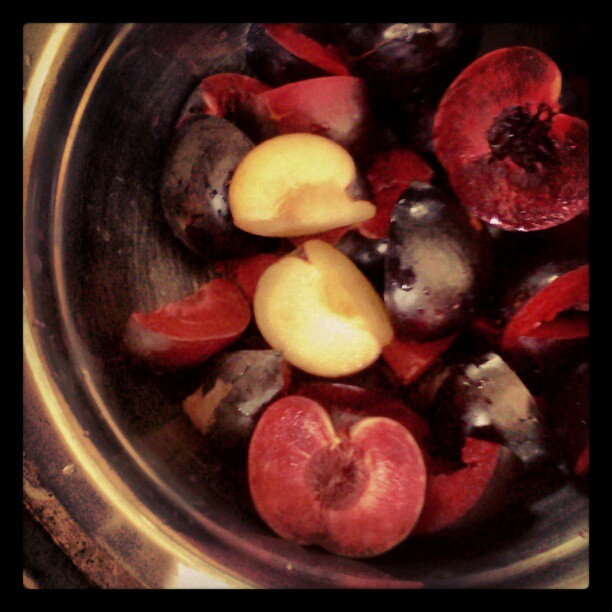
This plum coulis is versatile. It’s simple. It’s a very good way to use some of the stone fruit that’s booming right now. The hibiscus adds a nice floral note to contrast the tartness of the plums.

Put it on ice cream, over pancakes, into sparkling water. Maybe a cocktail or two…

Plum and Hibiscus Coulis
makes about 1 quart

1 lb plums, any dark skinned variety
1/2 cups sugar (or more if your plums aren’t very sweet)
1/2 cup honey
3/4 cup dried hibiscus flowers
1 cup water

Wash and pit the plums. Cut them into small pieces, about 8 per plum. Put them all into a big, heavy bottomed pot and add the water (keeps the bottom from scorching) and hibiscus flowers. Bring to a boil, then turn down the heat and simmer until very soft and the peels are pretty much separated from the fruit, about 20 minutes. Stir occasionally. Strain, pressing on the solids to extract as much juice as possible.

Return the liquid to the pot and add the honey and sugar. Bring to a boil and taste for sweetness, adding more sugar if you like. I like mine a little bit tart, it goes better with ice cream that way. Turn down the heat and simmer until the syrup has thickened up a bit, maybe 15 or 20 minutes. If you want it thicker, just boil it longer. While it simmers, stir it every once in a while to make sure it doesn’t burn. Stored in a jar in the fridge, it will keep for several weeks.

Thinking Inside the Box

Usually by this time of year, I’m rolling in lettuce and other greens, bringing in snap peas by the bushel, and harvesting radishes left and right.

But right now, my garden is almost 100% bolted greens and sad tomatoes, planted a little too late and still straggly.

The slugs ate all my beans, most of the basil, and the nasturtiums never took off like most years. The chickens killed most of the strawberry starts. The only thing I’m really getting a decent crop of is the peas, which are still less than other years.

I blame it all on starting a business and having a toddler who can’t actually come out into the garden with me unless I want more things to get un-done than done.

Thank goodness for farmer’s markets…when I can actually get there, which this year has only been about 3 or 4 times.

So, when I got asked if I would like a CSA box courtesy of Oxbow Farms in exchange for a little shameless promotion for the farm, I jumped on it. I have been a CSA member with that farm before, in fact, and I buy their produce at the market all the time. It was a perfect fit with my schedule too, since I was able to pick the box up the day before I hosted the first “public” dinner in our summer backyard dinner series.

I had Joe pick up the box, since he works close to where the pick-up location was, at Melrose Market. He strapped the whole thing to the back of the scooter and speedily brought it home for me to inspect.

What a bounty waited in that small box for me. There are 2 different sizes of shares you can purchase, and this one I believe was one of the small shares. Some things didn’t last past the next morning, but we are still eating the lettuce, and I still have some broccoli and a bunch of chard left, with plans to finish them up this weekend.

As for the other items in the box, I knew right away to what use they would be put. A simple salad to showcase the greens and baby root vegetables that Oxbox farms excels at. When we were getting a CSA box regularly, it was so awesome to always have fresh things to cook and eat that I didn’t have to work hard to provide. It always came with recipes from the farm to help us get creative with ingredients we might not have used before. Not to mention how outstandingly fresh everything was. Then our garden became much more productive and we decided that we could do without the box for a while. With me going back to work full time, getting a box on a regular basis is looking better and better…

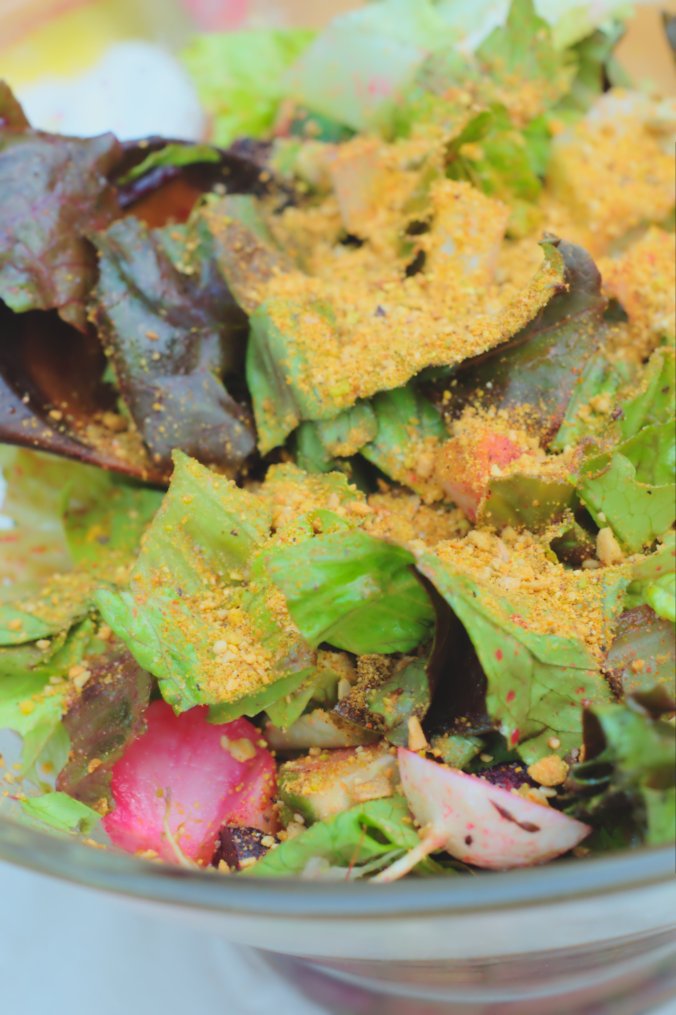
I’ve been dreaming of this magical pistachio dust ever since I saw it. I wanted to try making it with sunflower seeds, mostly because I really can’t ever make a recipe the way I see it written. I first made it with the pistachios as called for, then I made a batch using the sunflower seeds. It was excellent. And then I mixed the two batches to go over a huge salad. EVEN BETTER.

Spread lustily and shamelessly over a deep bed of red tinted lettuce, sweet roasted baby beets and turnips, and a few handfuls of snappy green cucumbers, it was a salad that couldn’t call for much more. A little drizzle of good olive oil and a shake or two of champagne vinegar was all it needed to become a delicate tumble of sweet and savory, crunch and silk.

This recipe is incredibly free form, which goes along with how it is to work in a garden. You just have to go with the flow sometimes and take what you can get–much like when you sign up for a CSA box, and you are at the mercy of Mother Nature and how she has treated the farm that week. And it fits in with my “French” theme from the past couple of weeks too, as it’s a salad I’m sure any frenchman would be glad to have on a warm summer evening as part of a larger meal.

Green Salad with Roasted Root Veggies
serves 8-10 as a salad course, 4-6 larger servings

1 medium-large head of good romaine type lettuce, washed well and dried
1 bunch very tiny beets
1 bunch baby turnips, or more beets if you prefer
3-4 small persian cucumbers
salt and pepper to taste
olive oil
champagne vinegar

Heat your oven to 400ºF. Remove the tops from the root veggies (keep them to sauté another time, if they are very tender) leaving about 1/2″ or so of stem attached to the bulb. Scrub them all well and trim off most of the long root part of the beets. In a glass baking dish, drizzle with just a touch of olive oil and roast until tender. This could take anywhere from 1/2 hour to an hour depending on the size of the veggies. You want them to be soft enough for a knife to slice into with no resistance.

While the root veggies roast, wash and dry the lettuce well. Slice each leaf down the middle, stack, then chop into bite sized pieces. Toss into a bowl and cover with a damp towel until you are ready to serve the salad.

Cut the cucumbers in half and then into slices, and keep covered in the fridge until just before tossing the salad.

Once the root veggies are done, let them cool just a bit, then cut any larger roots into small bite sized pieces. Add these pieces, along with the cucumber, to the lettuce and drizzle a couple of tsp each of olive oil and vinegar over it all, starting with just a little, tossing, and tasting before adding more. There should be no liquid in the bottom of the bowl, just enough to barely cover the leaves and vegetables. Add some salt and pepper and toss again. Cover the whole thing in a light blanket of pistachio dust and serve, passing more dust if need be.

Optionally, you can leave the salad undressed and unadorned and it will keep in the fridge for a couple of days to be dressed and eaten as needed.

Disclaimer: I received a complimentary box from Oxbow Farms in exchange for this post, but all the words, photographs and opinions are my own.

Lighten Up, Already

You might be noticing that there aren’t a whole lot of pictures from this trip to France I’m sharing with you. Part of it is because I had one of my cameras stolen at the very end of the trip.

Another part of it is that I was such a novice photographer then. I was using a camera I borrowed from my mom for the trip. Not only did I not know how to use it very well, at some point I realized it was taking terrible pictures because the lens was incredibly dirty in a place I could not clean. I didn’t have much experience with the DSLR format, and I had by no means learned anything about making my camera an extension of myself.

The third, and last part, is that I was so overwhelmed by how awesome everything was that I just plain forgot to take pictures. I was too busy living it.

Which is how it’s supposed to be on vacation anyway. Just like how when you’re on vacation you probably also do things you didn’t intend to do, you often forget to do the things that were on your list of “must-do”s. I definitely had a list like that, and probably didn’t do half of the things on it. I did however do amazing things I never would have thought of, like crawl through abandoned German Pillboxes from WWII, or swim in a chilly river to cool down from the 95º heat, or tour the Hennessy distillery.

I definitely also had a list of things I wanted to eat in France. In this case, I probably ate all of them. Bread, cheese, wine. Dessert. Sausages and classic roast chicken. More wine. Oh, and Pastries.

One thing I don’t specifically remember eating is quiche.

I was probably drinking too much wine…

Anyway. I do remember eating quiche with my Grandmother many many times in other places, however, so I’m sure we must have eaten quiche at least once. It was probably nothing like this quiche.

In France you don’t have to ever feel like you should be eating lighter. You never have to make excuses to yourself about why you just ate that crème brûlée after consuming some other rich thing for the main course. It’s because you ate a hearty, veggie laden salad for lunch and you walked halfway across whatever city you are in to do something spectacular like play pétanque or window shop.

You might be doing your normal thing, eating yogurt and toast for breakfast, and suddenly you realize you have eaten half a baguette smeared with thick, sunny gobs of salty french butter along with your full fat yogurt and delicious fruit straight from some quaint farm further south than you are. And then you go march up some steep hill to visit a tiny church with a gorgeous window and it totally doesn’t matter.

Here at home though, I’m not as active. Mostly because I’m on the lazy side when I’m not working, and also partly because I have a small kid and it’s kept me home and sort of stagnant a lot more than I’ve been used to in the past. Not that that’s an excuse, but I am not the slimmest I’ve ever been.

So lately, I’ve been attempting to lighten things up a bit. It’s been hard because the weather has been very reminiscent of a time other than summer, so the food part of that longed for season hasn’t exactly caught on all that strong yet. There’s been a few picnics and light summer suppers, sure, but so few that I can still count them on 2 hands.

I wanted to make this quiche with all cream and an all butter crust.

But I resisted.

It was kinda easy actually, because I knew it would be just as good as regular old rich French style quiche. Just…lighter. Rose would be proud. The peas get so sweet when they are baked into the custard, it’s really a treat. The tang from the buttermilk adds a layer of depth that you can’t get from just plain milk, and it plays so nicely with the eggs and the thyme. Just enough spicy (veggie) italian sausage to add a bit of heat, and just enough fat to make the whole thing seem indulgent and you’re set.

The polenta crust is a little different. When I saw this recipe from The Wednesday Chef, I put that on my list of things to try. Of course, I didn’t follow the recipe at all when I made it, I just made polenta like I would if I was going to cut it up and broil it so that it would be thick enough to mold into a crust. You could try adding an egg like she does, but I didn’t think it needed it. I would probably add cheese next time though, so if you give it a whirl let me know how it goes. The whole thing has a nice soft “this feels good to me” texture. The flavor is more delicate than a more traditional flour pie crust, and definitely won’t weigh you down as much.

Eat it with a salad and it will be good to you.

Then you can go back to eating richer things for dessert. I promise.

Buttermilk and Snap Pea Quiche with Polenta Crust
serves 6-8

For the Crust:

(I used Mark Bittman’s recipe from How to Cook Everything. It’s very straight forward and comes out great ever time, even if you can’t pay as much attention to it as you should. I’m going to repost it here with the adaptations I made for this recipe. It makes enough for 2 quiches or 1 quiche and some polenta to broil and serve with something else spectacular)
3 1/2 cups water or half water half broth (the original calls for 4, I reduced it to make the polenta set up thicker)
1 tsp salt
1 cup medium-grind cornmeal
fresh ground pepper
2 tbsp olive oil (or butter as the original recipe calls for)

Bring the water to a boil in a heavy bottomed medium sized pot. Salt the water and turn down the heat to medium. Add the cornmeal slowly while constantly whisking. Once you’ve added all the cornmeal, turn the heat down to low. Continue cooking while whisking once every minute for the first 5 minutes.

Switch to a flat bottomed wooden or silicone spoon and stir frequently (at least once a minute) until all the liquid is absorbed. It should begin to pull away from the sides of the pot, which will take about 15-20 minutes. Turn off the heat and taste for salt and pepper. Divide the polenta into 2 cake pans and allow to cool enough to handle before moving on to the next step. You can also use a larger pie plate if you are planning on making only one quiche, but the recipe will not make enough for 2 regular sized pie plates (9″).

Once the polenta has cooled so that you can touch it, cover it with a sheet of plastic wrap and slowly begin pressing the polenta out to the corners of the dish, continuing up the sides. You want the polenta to fill in the corners and to be evenly spread across the bottom and sides of the pan. For a 7″ pan, half of a batch will go all the way up the sides, for an 8″ pan it will be a little shallower. Allow the polenta to chill a few minutes in the fridge while you prepare your fillings.

For the filling:
(for one 7-8″ quiche–easily doubles)

3 eggs
1/3 cup lowfat buttermilk (up to 1/2 cup for a larger quiche)
1/3 cup whole milk (up to 1/2 cup for a larger quiche)
3-4 oz italian sausage (I use veggie to keep it kosher/vegetarian)
1/4 red onion, thinly sliced
1 cup sugar snap peas, roughly chopped
leaves from 1-2 springs fresh Thyme
2-3 oz shredded sharp cheddar, gruyere or similar cheese
salt and pepper to taste

Preheat the oven to 375º F.

In a large skillet, brown the sausage and onions until the meat is well browned and the onions have softened. Pour into the crust(s) and top with the chopped peas. Sprinkle the thyme, salt, and pepper over. Mix the eggs and milk well in a separate bowl, then pour over the other fillings, being careful not to splash the mixture over the sides of the crust. Top with the shredded cheese and a bit more salt and pepper.

Baked until the mixture is completely set in the middle and the cheese is well browned, about 40-50 minutes depending on your oven. Allow to rest for 10 or so minutes before cutting, or it will be very loose.